
Recently I’ve been looking into the potential that Windows Server Core holds for our environment. Like most eager new Core users, I imagine, I jumped in with grand visions of spinning up a VM quickly and being off to the races administering it from my desktop. The reality wasn’t quite the same, as I ran into a chicken and egg situation wondering how I could set up the machine when I could not yet connect to it. To complicate the issue, I couldn’t find a concise list of information on exactly what is needed to simply make the machine available so that I could begin to work with it.
With that in mind, I’ve compiled the following information in hopes of saving others the same headache. There’s nothing earth shattering here, but hopefully it will allow people to get started with Server Core quickly so that they can move on to more important things, like how the server will actually be used.
Let me know if you have any questions or suggestions. Hope it’s a help to you.
- Ports to request from your firewall team.
- TCP
- 5985, 5986 (WinRM)
- 445 (SMB) –This is up to you. I wanted to be able to move files to/from the server.
- 135
- TCP
- Local firewall rules to allow remote administration.
- Enable Remote Management groups
(Note: If you enable “Remote Service Management” on the host first, then you can do the others via PowerShell remoting. This can be helpful since copy/paste in things like VMWare console doesn’t always work.)
- Enable Remote Management groups
Enable-NetFirewallRule -DisplayGroup "Remote Service Management","Remote Event Log Management","File and Printer Sharing","Performance Logs and Alerts","Remote Volume Management","Windows Firewall Remote Management","Remote Desktop"
Default outbound traffic to allow
Set-NetFirewallProfile -Name Domain,Public,Private –DefaultOutboundAction Allow
Enable Ping (optional)
Enable-NetFirewallRule -Name FPS-ICMP4-ERQ-IN
- Remote management tools
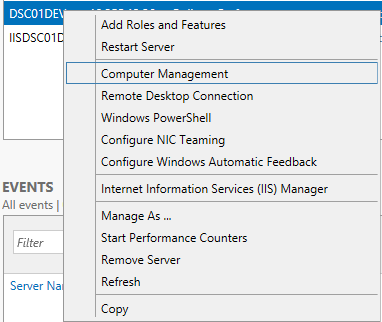
- Add the remote computer to Server Manager (available on Windows desktop and server versions).
- Once added, you can easily launch Computer Management and PowerShell for that specific machine by right-clicking it.

- Once added, you can easily launch Computer Management and PowerShell for that specific machine by right-clicking it.
- Connect via PowerShell remoting.
New-PSSession -ComputerName YourRemoteComputer | Enter-PSSession
- Cross-domain PowerShell Remoting (ie Dev or Test domains)
- If remoting isn’t enabled on your local machine, enable it.
Enable-PSRemoting -Force
- Add machines to the TrustedHosts list. (Depending on your setup, you might have to substitute IP addresses for the machine names in -Value.)
Set-Item WSMan:\localhost\Client\TrustedHosts -Value 'machineA,machineB'
Verify with:
Get-Item WSMan:\localhost\Client\TrustedHosts
- Use PSSession to connect
New-PSSession -ComputerName machineA -Credential (Get-Credential) | Enter-PSSession
- If remoting isn’t enabled on your local machine, enable it.
- IIS management (run on remote machine)
Install-WindowsFeature Web-Mgmt-Service

Set-Service wmsvc -startuptype "automatic"

Start-Service wmsvc
- Cross-domain PowerShell Remoting (ie Dev or Test domains)
- Add the remote computer to Server Manager (available on Windows desktop and server versions).
-
-
-
- Set HKLM\SOFTWARE\Microsoft\WebManagement\Server\EnableRemoteManagement to 1.
(This can be achieved using the local regedit tool and connecting it to the remote machine.) - Restart the WMSVC service.
Restart-Service wmsvc
- Connect from local IIS Manager for Remote Administration with the local administrator credentials of the remote machine.
- Set HKLM\SOFTWARE\Microsoft\WebManagement\Server\EnableRemoteManagement to 1.
- You can either use sconfig or the following remote PowerShell commands to allow Remote Desktop. (This is especially helpful for quickly getting to sconfig and other commands that do not operate properly with remote PowerShell.)
set-ItemProperty -Path 'HKLM:\System\CurrentControlSet\Control\Terminal Server'-name "fDenyTSConnections" -Value 0
set-ItemProperty -Path 'HKLM:\System\CurrentControlSet\Control\Terminal Server\WinStations\RDP-Tcp' -name "UserAuthentication" -Value 1
-
-
- Common configuration tasks
- The utility “sconfig” can be used for most setup items.
- For a more speedy and scriptable setup, below are some common configurations via PowerShell.
- Change date\time
Set-TimeZone -Name "Eastern Standard Time"
- Change computer name
Rename-Computer -NewName "machineA" -Restart
- Add to the domain
Add-Computer -DomainName "Contoso.com" -Restart
- Change date\time
Leave a Reply